What Is GetX Architecture?

Why Should You Choose GetX for Flutter Development?
1. Simple State Management
2. Effortless Dependency Injection
3. Seamless Navigation and Routing
4. Performance Optimization
5. Strong Community Support
Key Features of GetX Architecture
1. Reactive State Management
2. Built-In Observables
3. Route Management
4. Lightweight Framework
5. Testing Support
Where Can You Use GetX?
1. E-Commerce Apps
2. Healthcare Apps
3. Financial Apps
4. Social Media Apps
How to Use GetX Architecture in Your Flutter App
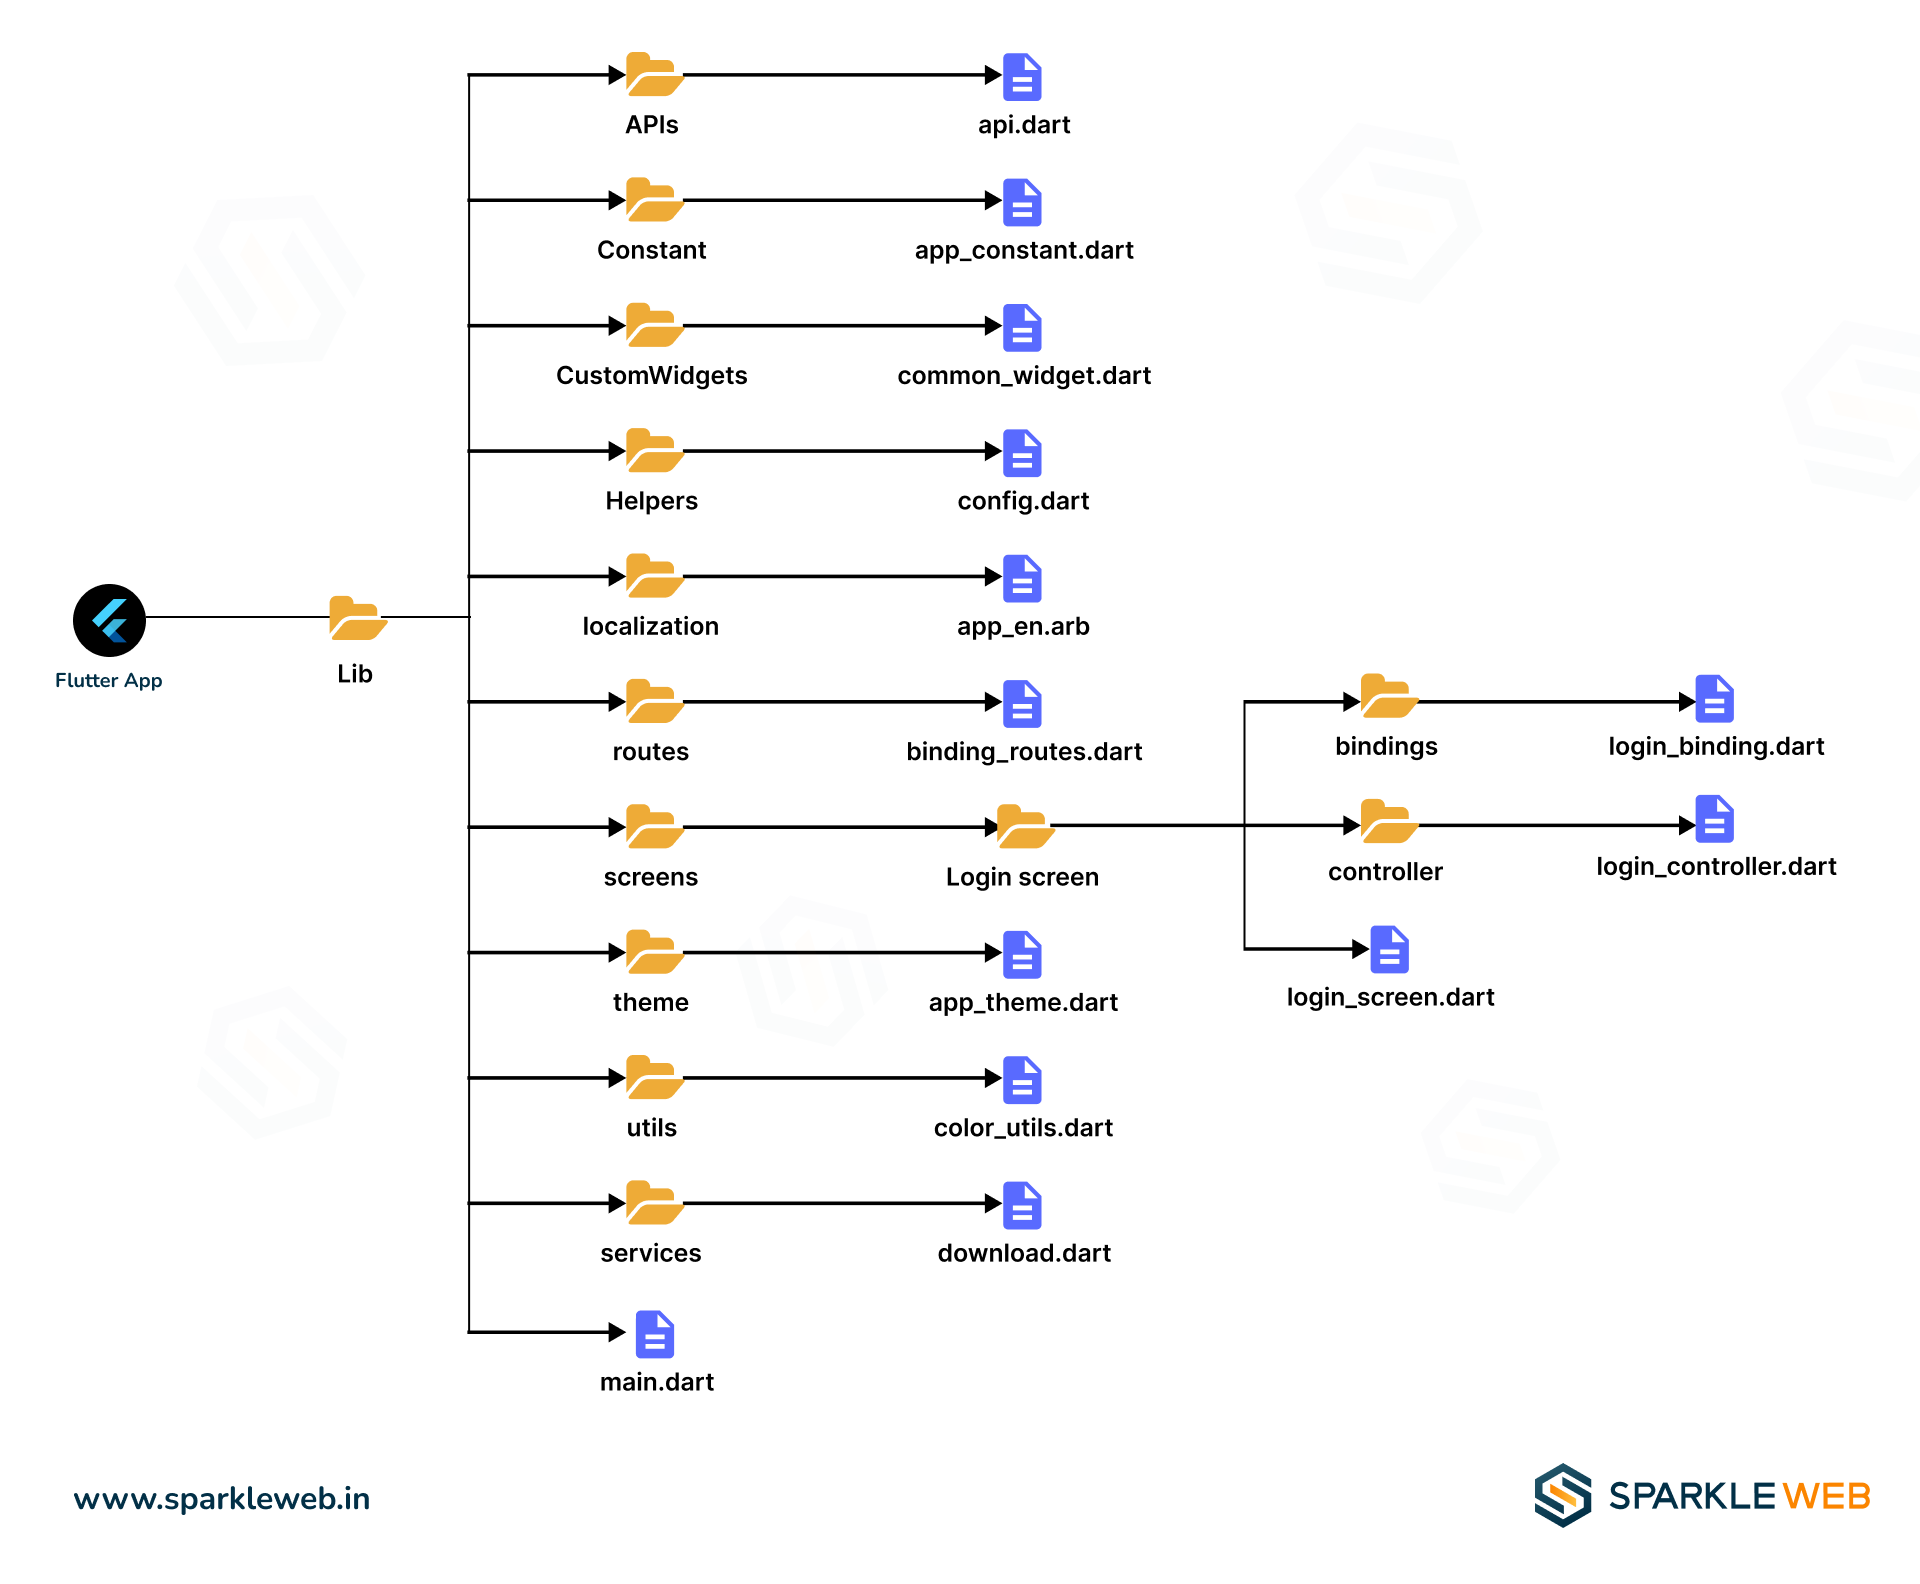
Step 1: Organize Your Project
Start by organizing your project in a way that makes it easy to manage. Here’s an example folder structure:
lib/
  ├── controllers/
  ├── models/
  ├── views/
  ├── bindings/
  ├── routes/
  ├── services/
  └── main.dart
Each folder serves a specific purpose:
- controllers/: Manages the app’s logic.
- models/: Stores data structures.
- views/: Contains the UI code.
- bindings/: Connects controllers to routes.
- routes/: Defines the navigation paths.
- services/: Handles background tasks like API calls.
Step 2: Add GetX to Your Project
dependencies:
  get: ^4.6.5
Run flutter pub get to download the package.
Step 3: Create a Controller
Controllers manage the app’s logic and state.
import 'package:get/get.dart';

class CounterController extends GetxController {
  var count = 0.obs;

  void increment() {
    count++;
  }
}
Step 4: Bind the Controller
Use bindings to initialize controllers automatically when a screen is accessed.
import 'package:get/get.dart';
import 'controllers/counter_controller.dart';

class CounterBinding extends Bindings {
  @override
  void dependencies() {
    Get.lazyPut<CounterController>(() => CounterController());
  }
}
Step 5: Build the UI
Use Obx widgets to update the UI whenever the state changes.
import 'package:flutter/material.dart';
import 'package:get/get.dart';
import 'controllers/counter_controller.dart';

class CounterView extends StatelessWidget {
  @override
  Widget build(BuildContext context) {
    final CounterController controller = Get.find();

    return Scaffold(
      appBar: AppBar(title: Text('GetX Counter')),
      body: Center(
        child: Obx(() => Text(
              'Count: ${controller.count}',
              style: TextStyle(fontSize: 24),
            )),
      ),
      floatingActionButton: FloatingActionButton(
        onPressed: controller.increment,
        child: Icon(Icons.add),
      ),
    );
  }
}
Step 6: Set Up Navigation
Define routes for easy navigation.
import 'package:get/get.dart';
import 'bindings/counter_binding.dart';
import 'views/counter_view.dart';

class AppRoutes {
  static final routes = [
    GetPage(
      name: '/counter',
      page: () => CounterView(),
      binding: CounterBinding(),
    ),
  ];
}
Step 7: Start the App
Initialize your app with GetX.
import 'package:flutter/material.dart';
import 'package:get/get.dart';
import 'routes/app_routes.dart';

void main() {
  runApp(GetMaterialApp(
    initialRoute: '/counter',
    getPages: AppRoutes.routes,
  ));
}
Why This Setup Works
-
Modular Design: Keeps the app organized and scalable.
-
Reusable Components: Write code once and use it everywhere.
- Simplified Navigation: Manage even complex routes with ease.
Conclusion
Ready to start your Flutter app development journey? Sparkle Web can help you create apps that are fast, reliable, and user-friendly. Contact us today to discuss your next big idea!


Mohit Kokane
A highly skilled Flutter Developer. Committed to delivering efficient, high-quality solutions by simplifying complex projects with technical expertise and innovative thinking.
Reply